The palomar knot is the first one I’d tell someone to learn if they only had time for one. It holds close to full line strength, it’s fast to tie even with cold or wet fingers, and it works on hooks, lures, and swivels without much fuss. If you fish braided line, this is probably already your default knot. If you don’t fish braid, it’s still worth making your default.
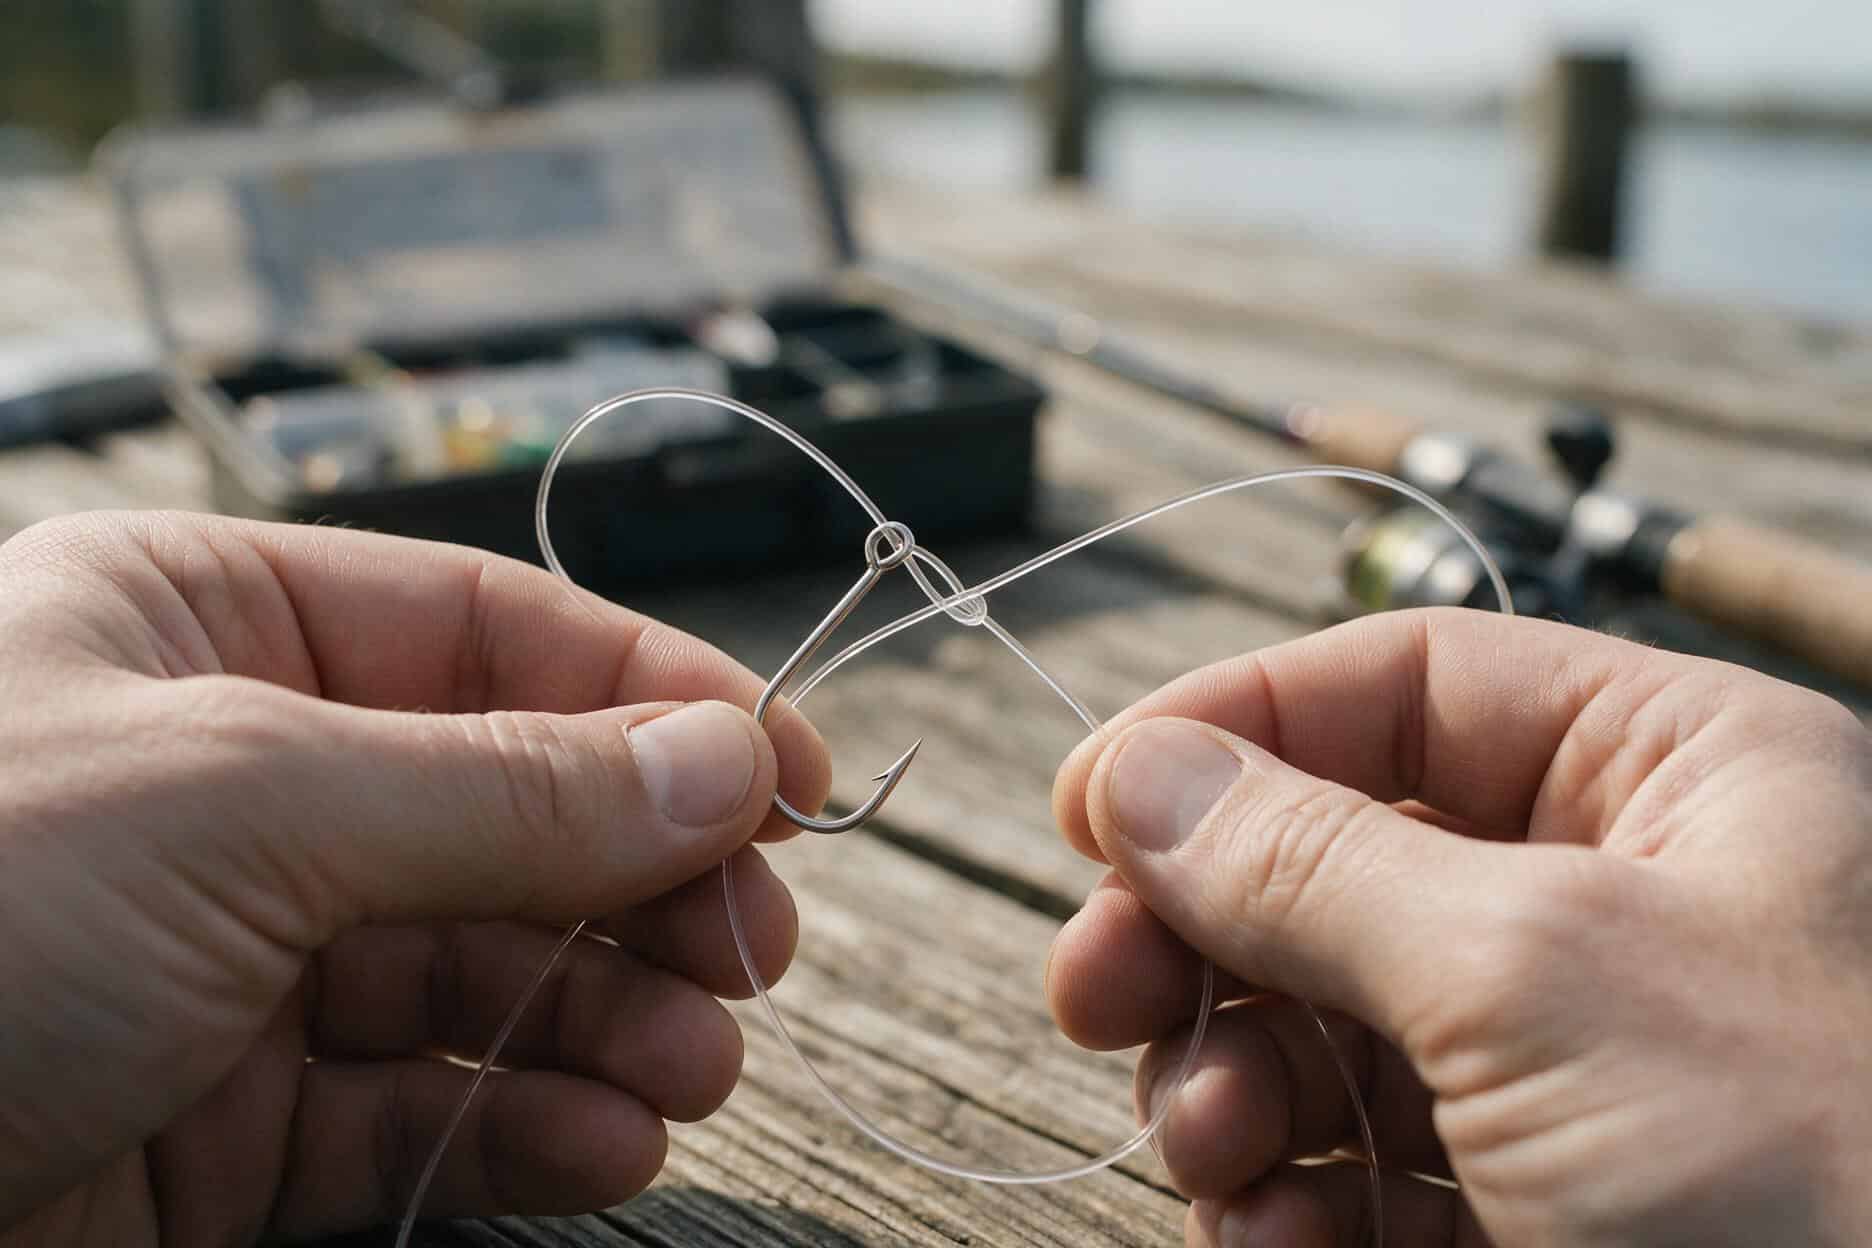
why the palomar knot holds up
Most knots lose some strength at the point where the line wraps sharply around itself. The palomar sidesteps part of that problem by using a doubled strand for the wraps, so the working line is never gripping against a single thin cross-section. In practice, that means it typically holds 90 to 95 percent of the line’s rated strength, which is about as good as a hand-tied knot gets without switching to a spliced loop.
For comparison, a standard clinch knot tends to test closer to 80 to 85 percent unless it’s tied with extra wraps and real care. That gap matters more than it sounds like it should when you’re fighting a fish that has already found one weak spot in your gear.
The tradeoff is that doubling the line only works if the hook or lure eye is big enough to pass a folded loop through twice. Very small eyes, or line much heavier than 20-pound test, make the doubled strand bulky and harder to seat. On those, a uni knot or an improved clinch knot is the better tool for the job.
when to reach for it
The palomar knot works on hook eyes, split rings, and swivels, and it doesn’t care much whether the line is monofilament, fluorocarbon, or braid. That range is part of why it ends up as the default knot in so many tackle boxes: one knot, tied the same way, covers most of what actually happens at the end of a line.
It also pairs well with finesse rigs and light line setups, where a bulkier knot would kill the action of the bait. If you’re already tying Texas rigs or drop shot rigs, the palomar is usually the knot doing the actual connecting work at the hook end.
It’s less useful on treble hooks with tight gaps between points, where the doubled loop can snag on the neighboring hook, and on lures with wide, flat bodies, where the loop needs to be tied larger up front to clear the body before it’s cinched down.
tying the palomar knot step by step
- Double about six inches of line and pass the folded loop through the hook eye.
- Tie a simple overhand knot with the doubled line, letting the hook hang loose in the middle of the loop. Don’t tighten it yet.
- Pass the loop completely over the hook or lure, so the whole knot sits below the eye.
- Wet the knot with water or saliva.
- Pull the tag end and the standing line at the same time to slide the knot down snug against the eye, then trim the tag end to about an eighth of an inch.
That’s the whole knot. Most of the failures people run into happen in steps four and five, not in the tying itself.
the mistakes that make it fail
Skipping the wet step is the most common one. Pulling a knot tight dry generates friction heat right at the point where the line is under the most stress, and both monofilament and fluorocarbon lose strength when that happens. It costs three seconds to wet a knot. It’s not worth skipping.
The second mistake is trimming the tag end flush against the knot. Line relaxes slightly under repeated casting and fighting fish, and a tag end trimmed too short can work its way back through the knot over time. An eighth of an inch of slack tag is cheap insurance.
The third is tying the initial loop too small on a lure with any bulk to it, crankbaits especially. If the loop can’t clear the body of the lure before you cinch it, you end up fighting the knot down over the widest part of the lure, which distorts it and weakens the final result. Tie the loop generously, slide it over the lure, then cinch.
palomar knot on braid, mono, and fluorocarbon
Braided line is limp and grips itself well, so the palomar knot is close to as strong as any knot you can tie on it. Slippage isn’t the usual failure mode on braid. Cutting through itself under repeated pressure is, so check a braid palomar knot after a few solid runs, not just once at the start of the day.
Fluorocarbon is stiffer and more prone to friction damage than mono, which makes the wetting step matter even more. Fluoro also takes a few pulls before it fully seats, so give the knot a firm tug after tying it and check that it hasn’t slipped before it goes back in the water.
Mono is the most forgiving of the three. It’s stretchy enough to absorb small tying mistakes and slippery enough that a properly wet knot seats easily. If you’re teaching someone their first palomar knot, mono is the line to practice on before moving to braid or fluoro.
where it fits with the rest of your knots
The palomar isn’t the only knot worth having ready without thinking about it. The guide to fishing knots covers where the clinch, uni, and blood knots earn their place in the box, and when it’s actually worth switching off the palomar instead of just defaulting to it.
I retie a palomar knot after landing any fish worth mentioning, not because it necessarily failed, but because a knot that’s been through a real fight isn’t one I want to trust blind for the next cast. Thirty seconds at the moment you don’t feel like stopping costs a lot less than the fish you actually wanted.
A step-by-step guide to tying the palomar knot, why it holds close to full line strength, and the mistakes that make it fail when it counts.
Double the line and thread it through the hook eye
Double about six inches of line and pass the folded loop through the hook eye.
Tie a loose overhand knot
Tie a simple overhand knot with the doubled line, letting the hook hang loose in the middle of the loop. Don’t tighten it yet.
Pass the loop over the hook or lure
Pass the loop completely over the hook or lure, so the whole knot sits below the eye.
Wet the knot
Wet the knot with water or saliva.
Pull tight and trim the tag end
Pull the tag end and the standing line at the same time to slide the knot down snug against the eye, then trim the tag end to about an eighth of an inch.