The improved clinch knot is one of the first entries in most anglers’ fishing knots toolkit, and one they never fully leave behind, even after picking up a Palomar or a Uni knot for other situations. It’s not the strongest connection out there, but it’s fast, it works on nearly every hook eye and lure you’ll tie on, and once your hands know it, you can tie it in the dark.
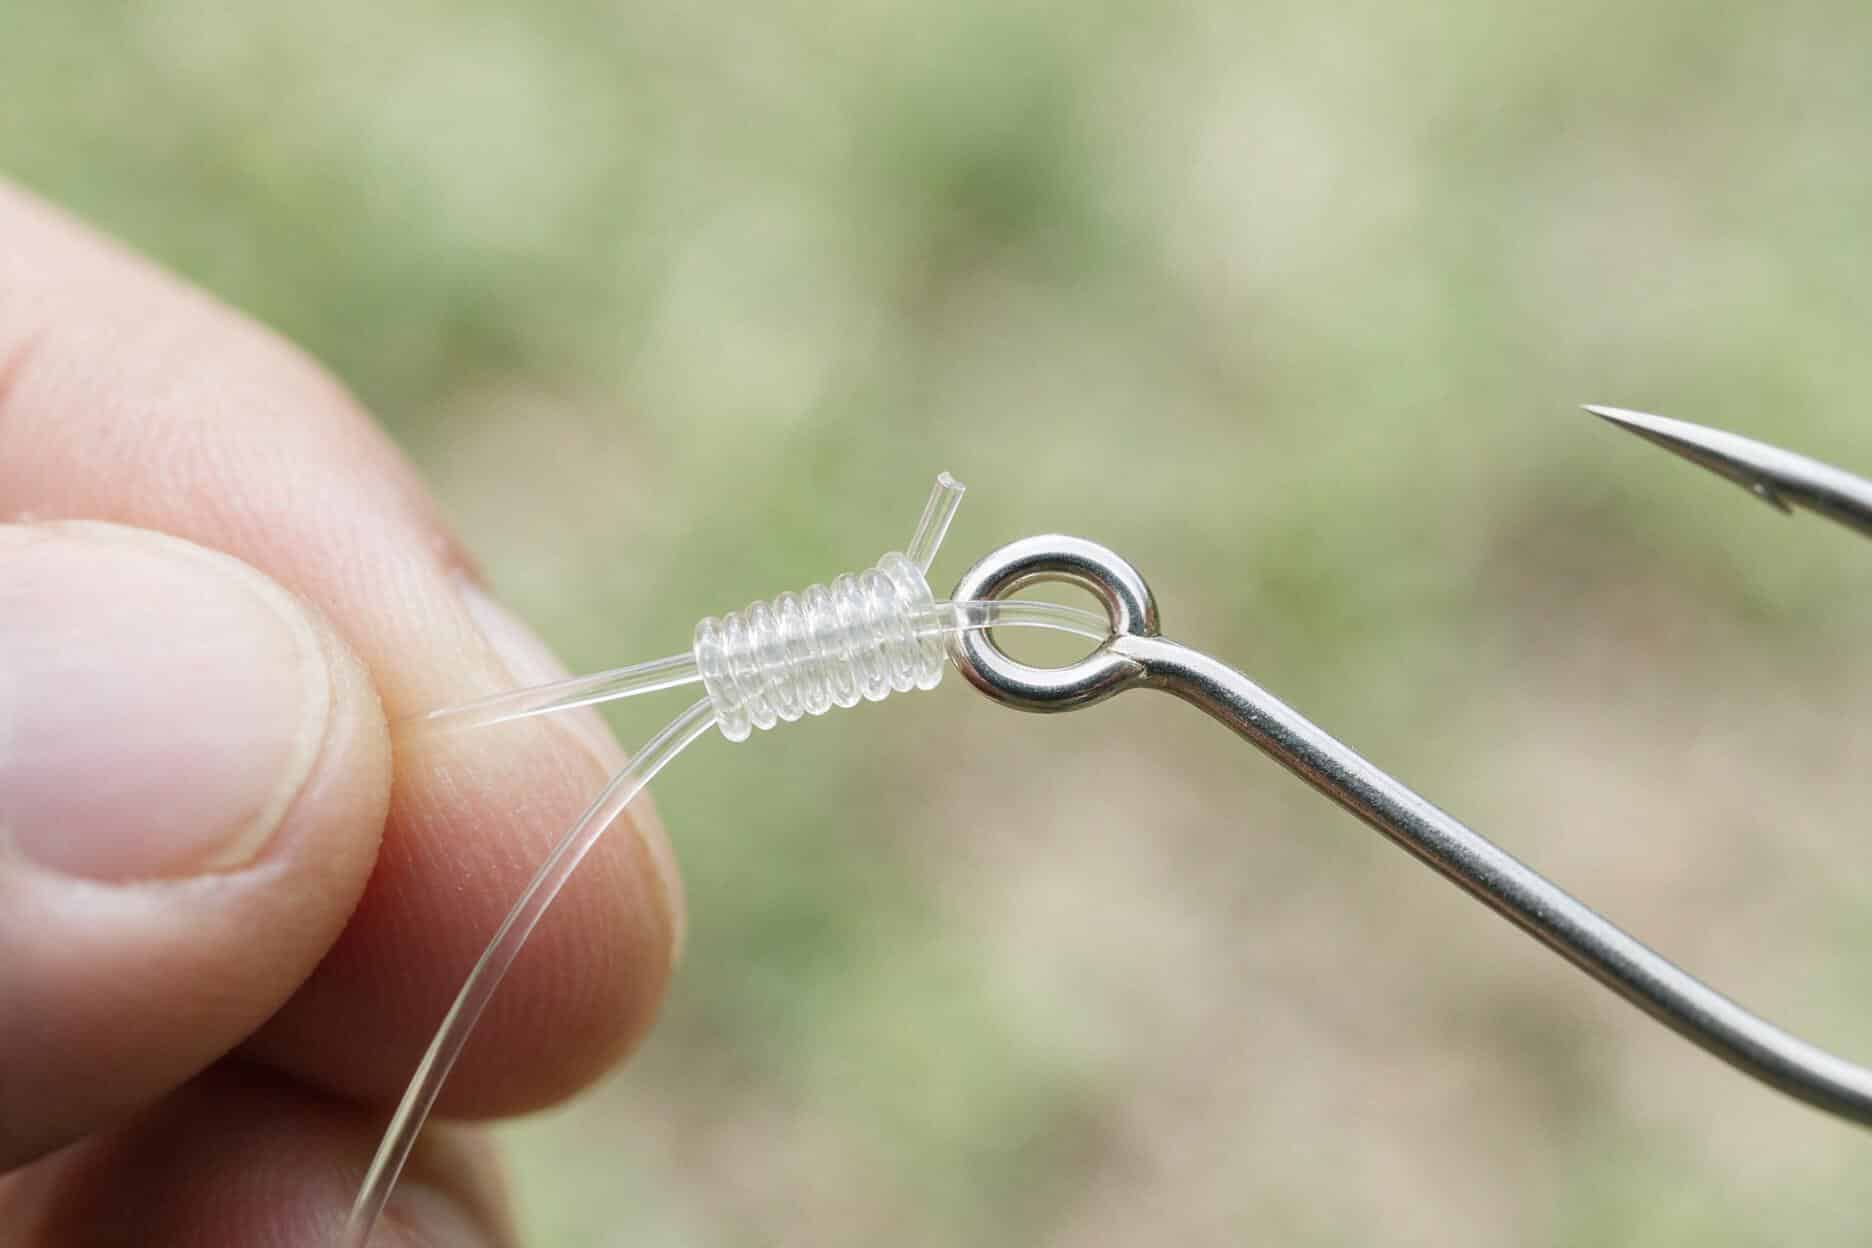
why this knot earns its spot in your rotation
Where the Palomar needs you to double the line and pass a loop over the hook, which gets awkward with bulky lures or split rings, the improved clinch ties directly through the eye with a single strand. That makes it the better choice for lures with hardware where a doubled line won’t fit cleanly, think crankbaits, spinnerbaits, and anything with a split ring.
Straight monofilament and fluorocarbon hold this knot well. Braid is a different story: the coils tend to slip against themselves on a slick braided line, so most anglers switch to a different knot, or add extra wraps, when tying braid directly to a hook.
tying it step by step
Thread six to eight inches of line through the hook eye. You want enough tag end to work with, running short is the most common reason the knot falls apart halfway through.
Wrap the tag end around the standing line five to seven times. Fewer wraps on heavier line, more wraps on lighter line, since thinner line needs more friction to hold once it’s cinched down.
Thread the tag end back through the small loop that formed right above the hook eye, the gap between the eye and your first wrap.
Now thread the tag end a second time, this time through the larger loop you just created. That second pass through is what separates the improved clinch from the standard clinch knot, and it’s the step people skip when they’re tying fast and wonder why the knot slips later.
Wet the line before you pull it tight. Dry mono and fluorocarbon generate friction heat as the coils cinch down, and that heat weakens the line right at the point it needs to be strongest. Pull the standing line and tag end simultaneously until the coils stack down snug against the eye, then trim the tag end, leaving a small margin rather than cutting flush.
the mistake that ruins this knot most often
Skipping the second pass through the loop is the single biggest reason anglers lose fish to a slipped clinch knot. Without it, you’ve tied a standard clinch knot, which holds a noticeably lower percentage of the line’s rated strength. The two knots look almost identical until you’re fighting a fish and one holds while the other doesn’t.
The second most common mistake is pulling the knot tight without wetting it first. It looks fine right after you tie it and then fails under load an hour later once the heat damage has had time to weaken the fibers, which makes it a frustrating knot to diagnose because the failure shows up nowhere near when the mistake happened.
how strong is it, really
Tied correctly and wetted before cinching, the improved clinch knot holds somewhere around 90 to 95 percent of the line’s rated breaking strength on monofilament and fluorocarbon. That’s competitive with most knots anglers reach for, and it’s plenty strong for the vast majority of freshwater situations. Where it falls short is heavy braid and very large hooks, where a Palomar or a uni knot holds up more consistently.
check it before you fish it
Before the first cast, give the knot a hard pull test, not a token tug, an actual firm pull with the rod loaded or by hand with gloves. A knot that’s going to slip usually shows some movement under that first hard pull rather than waiting until a fish is on to let go. This costs you ten seconds and saves you the fish you’d lose finding out the hard way.
It also matters after you catch a fish, not just before the first cast. Every fight works the knot, abrasion from a fish’s mouth, teeth, or structure the fish ran through can nick the line right at the wrap. Re-tie after landing anything that put up a real fight, retying takes less time than re-rigging after you’ve lost a lure to a knot that failed on the very next cast.
when to reach for something else
Braid is the clearest case for switching knots, the improved clinch doesn’t grip braided line’s slicker surface as reliably as it grips mono. If you’re fishing braid to a hook or lure directly, a Palomar knot is the better default. For connecting two lines of similar diameter, like joining a fresh section of leader, this knot isn’t built for that job at all, that’s what a surgeon’s knot or blood knot is for.
improved clinch knot FAQ
How many wraps should you use? Five wraps for line over 15 pound test, six to seven for lighter line. More wraps add friction and holding power on thin diameter line that would otherwise slip.
Why does my clinch knot keep slipping? Almost always a missed second pass through the loop, or pulling it tight dry instead of wetting the coils first. Both reduce the knot to a fraction of its rated strength.
Is the improved clinch knot good for braid? Not particularly. Braid’s slick surface lets the coils slip against each other, a Palomar knot holds braid more reliably.
Do you need to wet synthetic lines like braid too? Less critical since braid doesn’t generate as much friction heat, but it doesn’t hurt, and it helps you see the wraps seat evenly as you cinch it down.
The improved clinch knot is one of the first entries in most anglers’ fishing knots toolkit, and one they never fully leave behind, even after picking up a Palomar or a Uni knot for other situations. It’s not the strongest connection out there, but it’s fast, it works on nearly every hook eye and lure you’ll tie on, and once your hands know it, you can tie it in the dark.
Thread the line through the hook eye
Thread six to eight inches of line through the hook eye. You want enough tag end to work with, running short is the most common reason the knot falls apart halfway through.
Wrap the tag end around the standing line
Wrap the tag end around the standing line five to seven times. Fewer wraps on heavier line, more wraps on lighter line, since thinner line needs more friction to hold once it’s cinched down.
Thread the tag end through the small loop
Thread the tag end back through the small loop that formed right above the hook eye, the gap between the eye and your first wrap.
Thread the tag end through the loop again
Thread the tag end a second time, this time through the larger loop you just created. That second pass through is what separates the improved clinch from the standard clinch knot.
Wet the line and pull it tight
Wet the line before you pull it tight. Pull the standing line and tag end simultaneously until the coils stack down snug against the eye, then trim the tag end, leaving a small margin rather than cutting flush.
How many wraps should you use?
Five wraps for line over 15 pound test, six to seven for lighter line. More wraps add friction and holding power on thin diameter line that would otherwise slip.
Why does my clinch knot keep slipping?
Almost always a missed second pass through the loop, or pulling it tight dry instead of wetting the coils first. Both reduce the knot to a fraction of its rated strength.
Is the improved clinch knot good for braid?
Not particularly. Braid’s slick surface lets the coils slip against each other, a Palomar knot holds braid more reliably.
Do you need to wet synthetic lines like braid too?
Less critical since braid doesn’t generate as much friction heat, but it doesn’t hurt, and it helps you see the wraps seat evenly as you cinch it down.